Unityで自分で操作できる車を作ってみる。基本の部分はUnity公式のチュートリアルを参考にした。
Wheel Collider チュートリアル - Unity マニュアル
今後物体検出などを行っていきたいので、実際の車っぽいものを走らせたいので以下のアセットを使用する。
まずはHierarchyに3D Object→Planeで地面を作る。サイズは十分大きいように、X=1000、Z=1000としておく。また、Inpector→Add componentからMesh coliderを追加する。

次にHierarchyにからのObjectを作成し、Carと名前を付ける。そして下のProjectから Assets/Simple Vehicle Pack/Prefabs/Car_1を選択し、Carの下に配置する。(Car_1でなくともほかのプレハブでもOK。)

次にCar_1下にあるボディのオブジェクト(Object010)にBox Colider、タイヤのオブジェクト4つ(Object011~014)にInpector→Add componentからWheeel Coliderを追加する。これがタイヤのコライダーである。わかりやすいようにCarのY座標を1にして浮かしてある。

これで再生を押してみるとわかるが、まともに着地すらできない。これはWheeel Coliderの形状がタイヤとずれてしまっているため。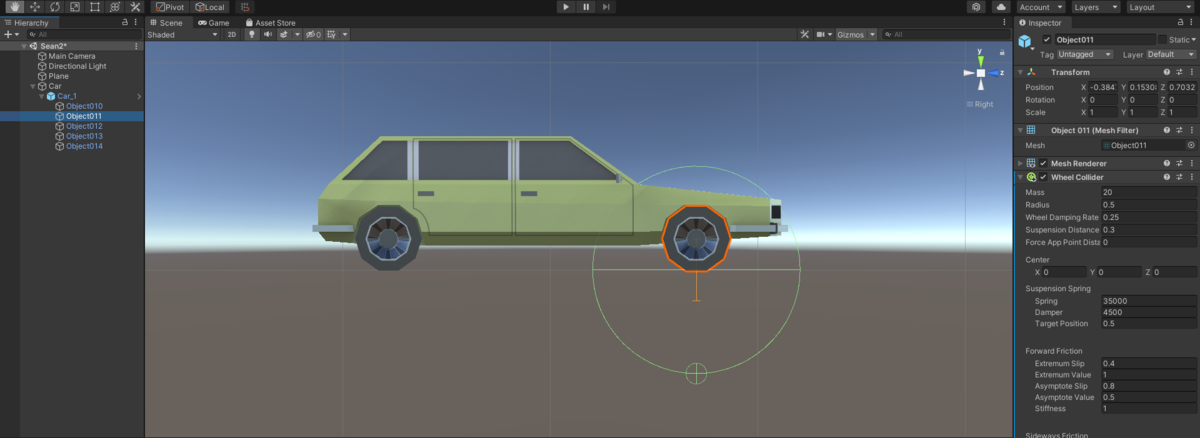
調整のために、各Wheel ColiderのRadiusを0.15、CenterのY座標を0.15にしておく。

これでまともに着地できるようになった。
次に操作をできるようにする。Car.csというスクリプトを作成し、Carオブジェクトにアタッチし、以下のコードをかく。
using System.Collections;
using System.Collections.Generic;
using UnityEngine;

public class Car : MonoBehaviour
{
    public List<AxleInfo> axleInfos;
    public float maxMotorTorque;
    public float maxSteeringAngle;
    public float remoteMotorTorque;
    public float remoteSteeringAngle;

    // Start is called before the first frame update
    void Start()
    {
        remoteMotorTorque = 0;
        remoteSteeringAngle = 0;
    }

    public void FixedUpdate()
    {
        Debug.Log("update");
        float motor = maxMotorTorque * (Input.GetAxis("Vertical") + remoteMotorTorque);
        float steering = maxSteeringAngle * (Input.GetAxis("Horizontal") + remoteSteeringAngle);

        foreach (AxleInfo axleInfo in axleInfos)
        {
            if (axleInfo.steering)
            {
                axleInfo.leftWheel.steerAngle = steering;
                axleInfo.rightWheel.steerAngle = steering;
            }
            if (axleInfo.motor)
            {
                if (motor > 0)
                {
                    axleInfo.leftWheel.motorTorque = motor;
                    axleInfo.rightWheel.motorTorque = motor;
                    axleInfo.leftWheel.brakeTorque = 0;
                    axleInfo.rightWheel.brakeTorque = 0;
                }
                else
                {
                    axleInfo.leftWheel.motorTorque = 0;
                    axleInfo.rightWheel.motorTorque = 0;
                    axleInfo.leftWheel.brakeTorque = motor * 5 * (-1);
                    axleInfo.rightWheel.brakeTorque = motor * 5 * (-1);
                }
            }
        }
    }
}
[System.Serializable]
public class AxleInfo
{
    public WheelCollider leftWheel;
    public WheelCollider rightWheel;
    public bool motor;
    public bool steering;
}
ここで、maxMotorTorqueはアクセルの最大強さ、maxSteeringAngleはハンドルの最大角度であり、それぞれ500、20に設定しておく。remoteMotorTorqueとremoteSteeringAngleは外部から車を操作するためにつけているもので、今回は無視していい。if (axleInfo.motor)で分岐しているのは、↑矢印が押されたときはアクセル、↓矢印が押されたときはブレーキとなるようにしている。motorTorqueに値を与えるとアクセルがかかり、brakeTorqueに値を与えるとブレーキがかかる。注意点として、値は保持されるのでどちらかに値を設定した場合は、もう片方を0にする必要がある。0にしないと想定した動作をしてくれない。
コードが書けたら、CarオブジェクトのInspectorから、Axle Infosの+を押し、前輪はStearing、後輪はMotorにする。

完成したら再生を押す。矢印で車が操作できる。
